You’ve arrived at this page because you’re ready to embark on the exciting experience of starting a new blog on WordPress.
Follow these steps to guarantee that the design of your blog is something you appreciate and want to share with others. Create a username and password for your account as the first step.
Your Personally Identifiable Information
Signing up for a WordPress.com account is the first step in getting your new blog up and running. Go to WordPress.com and pick Get Started from the drop-down menu to start your blog.
You’ll need your email address (so you can be notified when new people join your blog), a username, and a password (which you should keep safe!). If you aren’t ready to commit to a custom domain name or a plan right now, you can do so later by using the free WordPress.com subdomain and free site option.
Characteristics of Your Personality
The name of your blog is important since it informs people about your site before they have read a single post. Once you’ve decided on a name, go to Settings and modify the Site Title to match. You may also include a catchy tagline in your submission!
When you join WordPress, you are given a web address such as myawesomeblog.wordpress.com; however, you can register your domain such as myawesomeblog.com. For the first year, any WordPress.com subscription includes a free domain name. Write your first blog entry in the second step.
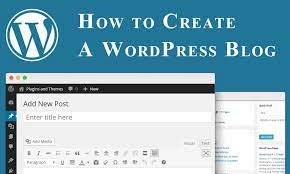
It is now time to put your writing abilities to the test! To create your first introduction to the world, go to your dashboard and select Posts > Add New Post from the drop-down menu. In your post, please introduce yourself to your readers, explain your blog, and urge them to join you on this exciting new journey.
Fill in the blanks with pertinent information.
You’ve been accepted to the program! This is where you’ll fill in the blanks with the information you’ve gathered. I always prepare my stuff in a document before submitting it to WordPress. It helps me from feeling overwhelmed by the formatting, editing, and writing that is going on simultaneously.
However, before you start your project, keep in mind that you need to save your work frequently. WordPress saves your progress as you work, but the changes may be lost if your internet connection is lost for an extended period. To save your work, click the “Save draft” button in the upper right-hand corner of the screen.
The Application of Hyperlinks
In addition to producing a decent blog post, including links to relevant content, whether internal or external, is a crucial part of the writing process. The anchor text is also vital for SEO because it notifies site crawlers about the content of the page you are linking to.
There are two ways to incorporate hyperlinks into your work. Select the text you want to link in the first step of the operation. Select the link symbol displayed in blue from the floating menu box that appears next to it.
Make a professional presentation of the content.
Even if your information is well-written, if it is not organized in a reader-friendly manner, your audience is unlikely to devote as much time to the piece as you expect. It’s critical to remember that readers don’t want to waste time figuring out how to navigate your information, so make it as simple as possible for them.
Headings
When organizing a blog post, utilize headings. Headings are used in a hierarchy to inform the reader (and search engines) about what is important on a page.
Here’s an illustration of how it works: Page titles are labeled H1 and appear near the top of a page’s hierarchical structure. Only one H1 should be used in a blog post; any more will confuse Google (and your reader).
H2s are abbreviations for subheadings. It’s possible that one, two, or all of these will show in your post. In the hierarchy of a blog article, H2s are the following step up from the preceding level. In every situation, they are less potent than an H1. H3s appear in the same order as H2s, always after the latter. The following categories all follow the same pattern.
Ensure that your posts are visible.
After you’ve published your first item, it’s time to consider how you’d like to present your work on your blog. There is now a Blog Posts block on the site! This ID will show your blog articles on various pages of your website.
You can present all of your material on your website’s homepage in a neat grid design. Then you can create specialized pages for specific types of postings, such as a Desserts page that only displays Desserts entries or a Recipes page that displays Recipes entries. All of this is possible simply by utilizing the Blog Posts section.
Create a navigation menu for your website.
A website’s navigation menu lists links at the top of the page that users can utilize to traverse the site. Your home page (along with your about and contact pages), categories, individual posts, and even links to other websites can all be included, among other things. Open the Appearance Editor and drag a Navigation block into the canvas to begin.
Find Your First Group of Supporters
So, now that your blog is live, how can you get people to visit it? To begin, add a conspicuous follow button to any page, post, sidebar, and footer using the Subscription Form block. Invite your friends and family to click the “follow” button to receive notifications of future posts.
Bonus
You’ve created a solid foundation for your blog if you followed these steps.
Navigate to Options Discussion and look over your Discussion options to see how you may regulate how people comment on your blog entries.
Appearance Themes has a variety of themes to choose from if you want to give your blog a new look.
Using the Mailchimp block, you may create a mailing list for your website.