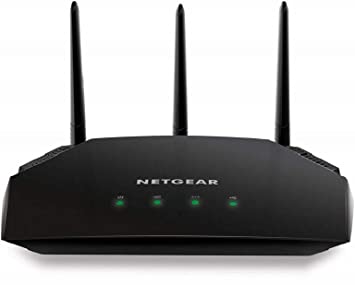
Faster internet is the basic necessity of human along with the food, cloth, and shelter. As fast as the industrialization and the digitization increasing, the demand for a faster internet increasing too. Whether you are watching your favorite series at home or playing online game, all you need is the faster internet connection. Post pandemic the demand of internet has increased more as people are working from home and students are also attending their classes online. But, how to make this possible? Well, answer is clear get a router of brand like Netgear.
Why Do You Need a NETGEAR WiFi Router?
The WiFi modem has a limited reach up to some devices and has a low proximity. And as you know, no one likes a slow internet connection. With the help of a NETGEAR WiFi router, you can boost up your internet speed as well as its proximity. But, the question arises, how can you set up a NETGEAR WiFi router? Read further to know.
Steps to Set Up NETGEAR WiFi Router Using Manual Method
Setting up a router can be difficult sometimes as it consists of intricate parts like cables and antennas. You have to be very careful while unboxing and installing a NETGEAR WiFi router. Thus, you need an easy guide for installing your WiFi router. You can easily set up your NETGEAR router manually by using the following instructions:
Unboxing
Unbox your NETGEAR router. You will find a WiFi router, an Ethernet cable, antennas, a quick startup guide (manual), and a power adapter. Make sure that no item gets damaged during unboxing. Also, check if you find any broken part inside the box.
Set Up Hardware
- Now, take the power adapter and connect it to the router.
- Plug in the router and switch it on.
- Wait for the LED light to glow green.
- Then, connect the router to the modem. You can connect it using an Ethernet cable or using a wireless method.
Note: Check all the wires before connecting to ensure that there are no cuts on it as it may lead to poor internet connection or may fall you in NETGEAR WiFi router configuration issues.
Setting Up the NETGEAR Router
- Now switch on your PC and open your web browser. You can use any web browser like Google Chrome, Mozilla Firefox, Microsoft Edge, Safari, Opera, etc.
- Make sure you use the updated version of the web browser so that you won’t face any difficulty in performing NETGEAR WiFi router setup.
- Go to the address bar of web browser and type www.routerlogin.net
- Press Enter.
Note: You can also log in via the default router login IP.
NETGEAR Router Login Page
- Once you press Enter, you will be redirected to the NETGEAR router login page.
- The login page will ask you to fill your router username and password.
- Locate the username and password and fill them.
- Refer to the user manual if you are unable to find the admin details.
- Click on the Log In button to proceed further.
- The routerlogin.net setup wizard will open.
Basic Home Screen
- The basic home screen is also called as NETGEAR Genie setup wizard.
- The screen will show a few instructions for further setup.
- Follow the instructions displayed on the screen.
- Congratulations! You are done with NETGEAR WiFi router setup.
Conclusion
To install a NETGEAR WiFi router using routerlogin.net or 192.168.1.1 you have to follow these steps. All you need to do is, go through these instructions carefully and perform the NETGEAR router setup. If you find any problem in NETGEAR WiFi router setup then consider restarting your modem and repeat the same steps.
