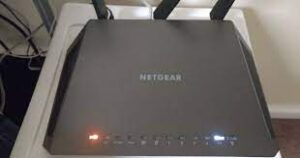
The color red is known to depict danger in endless scenarios. It’s like the color of the devil. Fire in the apartment? Red danger alarm rings. On-site construction going on? Red stop sign appears. Phone’s battery about to die? Red LED light starts pulsating.
Is your Netgear extender blinking red too? Again, meaning something is wrong with the WiFi device. But, fret not because we can help you fix the red light issue. Simply walk through the troubleshooting tips mentioned in this article and learn how to convert the red light to green.
Reasons Why Your Extender is Blinking Red
Mentioned below are the possible reasons why you’re Netgear WiFi extender is flashing red:
- Hardware connectivity issue
- Your extender isn’t connected to the router
- The firmware of your device isn’t updated
- An internet issue from the end of your ISP
- Loose cable connections
Now that you’re a little familiar with why you’re facing the Netgear extender red light issue, it’s time to take care of the troublemaker.
Troubleshooting: Netgear Extender Red Light Issue
Explained below are the topmost ways that’ll surely help you in getting rid of the Netgear extender red light issue. On the off chance, if none of the tips work for you, it is recommended that you reset your WiFi device by accessing http://mywifiext
-
Perform Netgear Firmware Update
One of the major reasons why you’re facing the red light issue is because the firmware of your device is outdated. Therefore, make sure that you perform Netgear firmware update before accessing the Netgear Genie setup wizard.
Follow the guidelines outlined below and learn how to update your WiFi range extender:
-
Power on your Netgear extender.
-
Connect the extender to your home router.
-
You can connect both your WiFi devices using a cable.
-
Then, switch on your laptop and connect it to the extended Netgear_ext SSID
-
Open up a web browser on your system and log into your extender.
-
Go to the Settings option and click on the Firmware Update button.
In this way, you’ll be able to update the firmware of your WiFi device without any hassle.
-
Your Internet Connection Should Be Strong
A weak internet connection is another reason why the red light issue is troubling you. To fix the internet issue, consider the points mentioned below:
-
Connect your extender and WiFi router properly.
-
Rather than connecting your devices wirelessly, connect them using a cable instead.
-
If the issue persists, get in touch with your Internet Service Provider ASAP.
-
The Hardware of Your Device Should Be Fine
Make sure that your power adapter as well as the power cable should be in working condition. If any of these two things are damaged, waste no time in finding a replacement.
-
No Loose Cable Ends
Apart from fixing the hardware of your Netgear extender, you also need to check for loose cable ends. Every cable (including power cable and Ethernet cable) that you’re using to create connections with your extender should be finger-tight.
Also, make sure that none of the cables are worn out. On the off chance, if they are, you already know what to do.
-
Reset Your Netgear WiFi Extender
Have none of the troubleshooting tips mentioned in this article been of help to you? Do you still see the red light on your Netgear extender? Oops! Sadly, you’re just left with one solution to fix the issue. And that is, factory default reset.
There are two ways through which you can restore your device to its default settings. The first is by accessing http://192.168.1.250default IP and the second is by pressing the Reset button.
You are free to choose any method to reset your Netgear WiFi range extender. Once you reset your WiFi device, the red light issue will surely vanish into thin air.

